Final Milestone
For my final milestone, I was able to successfully have the accelerometer communicate with the servos so that with each movement of the accelerometer, each servo would perform an equal and opposite one so that the phone would remain stable. I used a filter function to increase stabilization, and I hope to use the gyros in the accelerometer to further stabilize the gimbal in the future. This project has taught me a lot about coding in the Arduino and stabilization, and I hope to use it in a future drone project!
First Milestone
For my first milestone, I learned how to code the Arduino and Accelerometer in the Arduino IDE so that it would print acceleration in the X and Y direction. I also added “If” statements to have a specific range of data near zero to read zero so that it will prevent jittering in the future. After this, I hope to understand how to code servo movement and have the servos communicate with the accelerometer by reading and reacting to changes in acceleration in the X and Y directions.
Starter Project:
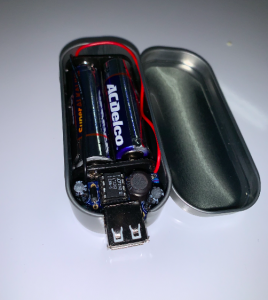
Minty Boost Portable Phone Charger


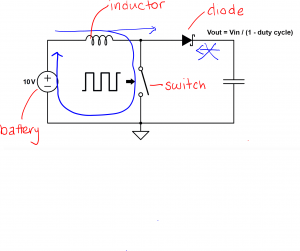
I’ve learned a lot from this project. The use of a boost converter allows the two 1.5 Volt batteries to charge the phone. The phone takes a voltage between 4.8 and 5.2 Volts, so the boost converter increases the voltage of the two batteries to meet this. It does so by rapidly opening and closing a switch to have current build up in an inductor. This inductor stores energy in the form of a magnetic field. After the current is built up, the switch is open and the voltage is released and thus the voltage into the phone is more than the 3V that would have originally come from the two batteries. The resistors in the circuit manage the voltage to prevent it from exceeding the maximum voltage that the phone can input. The diode used in the circuit simply prevents the phone from charging the battery as it only allows current to flow one way: into the phone. Soldering was a new experience for me. It is quite simple and is an essential part of completing this project as I soldered each component to the circuit.
There were some challenges, however. Soldering each piece to the circuit took a very long time as I often got stuck on some holes where I couldn’t get the solder through completely. This made the process much more lengthy. When everything was put together and I plugged it into a phone, the circuit heated up and the phone did not charge. Originally, I assumed that it was shorting and that my solder was touching somewhere in the circuit, but I realized the next day that the chip was turned the wrong way. I turned it around and the charger was a success.
This project was pretty fun and easy to do. The instructions were clear and assembly was simple, but understanding the functions of different components and the overall system took me a while and pushed my limits. I feel that I learned quite a bit about different pieces and functions and I hope to apply them in my gimbal.


