Hand Gesture Controlled RC Car
There are 4 components to the Hand Gestured Controlled RC Car: The chassis, the motor driver, the Arduino, and the flex sensors. The chassis is the body of my car and includes motors which is connected to the motor driver. The motor driver is also connected to the Arduino, which tells the motor driver how to operate. The flex sensors are also connected to the Arduino, which also sends certain commands when conditions of the flex sensors are met.
Engineer
Amanjit S
Area of Interest
Computer Science
School
Thomas A Edison
Grade
Incoming Senior
Final Milestone
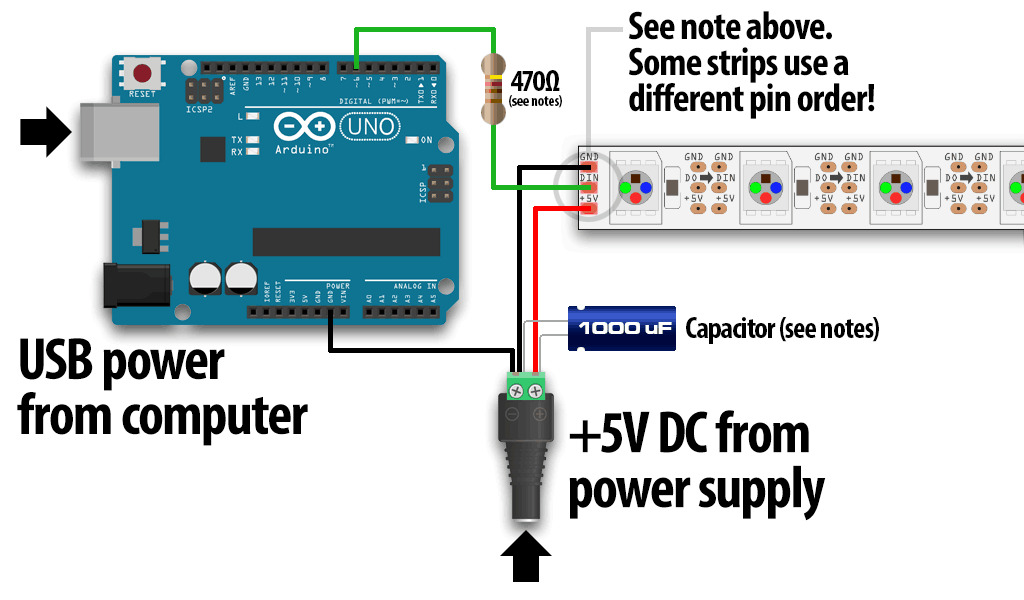
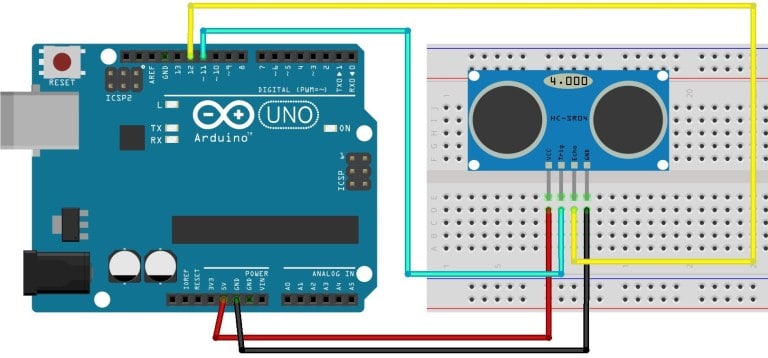
For my Final Milestone, I have added LED lights and an Ultra Sonic Sensor. For the LED Lights, I first looked for a library, and used the example code to check and see if they work. After I confirmed that the lights work, I combined my previous code with the LED lights, giving each gesture a unique color. I used for loops in the code which helped me in assigning the colors to gestures. The Ultra Sonic Sensor sends out sound waves, and if an object is within range, the sound wave will reflect back and give us a value. In my code I set the maximum range at 200 cm, and also added a feature in which the car will go backwards and stop if there is an object within 2 cm of the car. For this device I also used a library and the example code to check if the device functions properly. I have the automatic reverse feature on the top of my code in the loop, which means that if I give the command to go forward, even if there is something in front of the car, the reverse feature will get priority and carry out its task.
Second Milestone
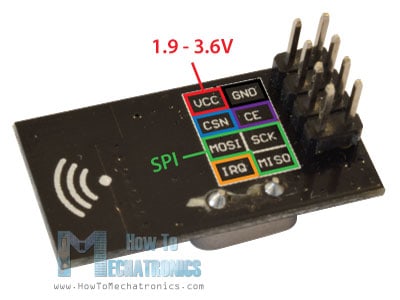
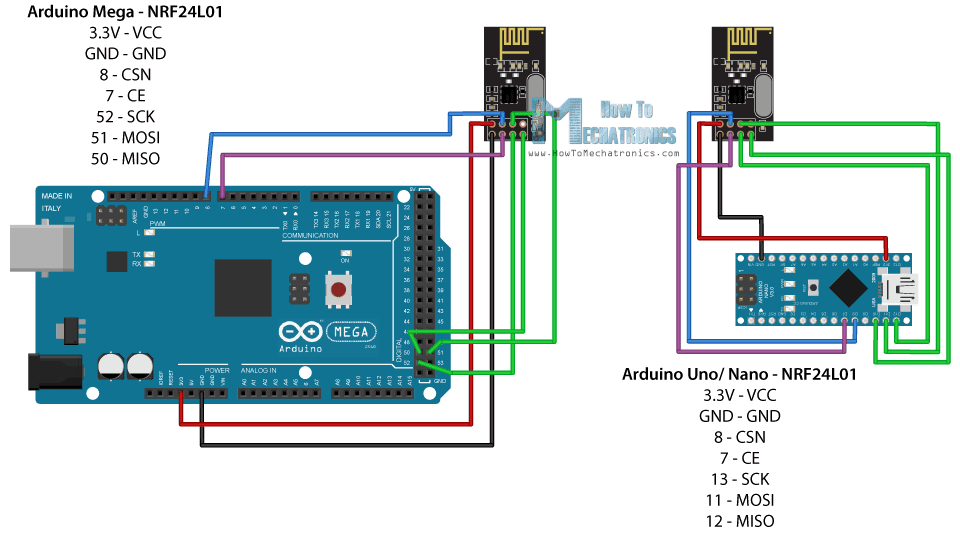
For my Second Milestone, I added nrf modules to the Arduino Nano and the Arduino Uno. This allows me to connect the two Arduinos wirelessly. With the SPI pins connected to the corresponding SPI pins on the Arduinos, the nrf module can take in data, and send it to the other nrf module, on a different Arduino. I also added some code to allow the flex sensors to move the car. By having communication, I just needed to code the Arduino Uno, which is on the car, to have a reaction to the change in resistance of the flex sensors, which are connected to the Arduino Nano on the glove. So, when a flex sensor is bent, and the resistance increases, the nrf module, which is connected to the Arduino on the glove, sends that data to the other nrf, which is connected to the Arduino on the car. The Arduino on the car then takes that data and determines whether or not to take a certain action like going forward or backward.
First Milestone
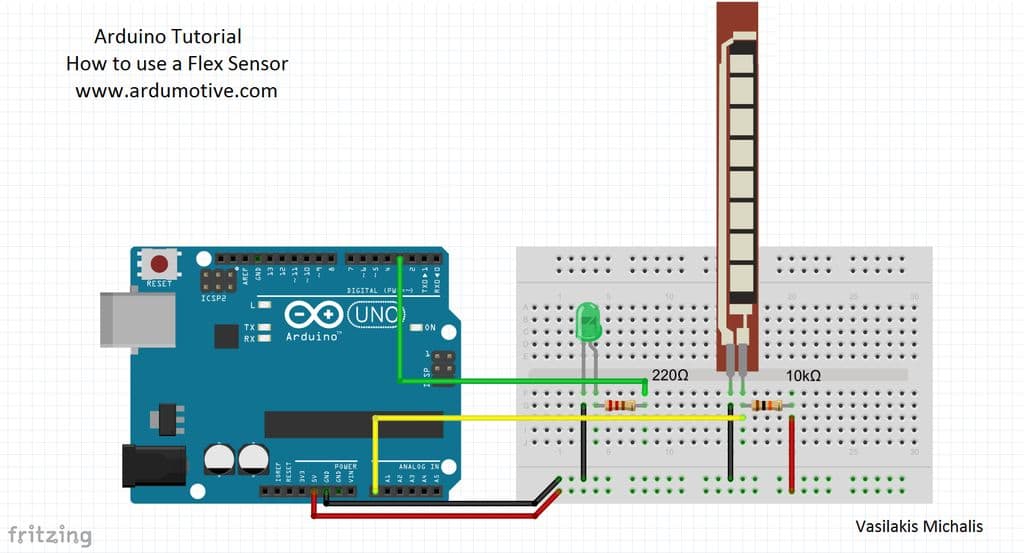
My First Milestone for the Hand Gesture Controlled RC Car was having the flex sensors move the motors on the car. To do this, I first had to build that chassis, the connect the Arduino to the motor driver, which is also connected to the motor themselves. After testing the flex sensors and the motors, I coded the ardunio to allow certain gestures control the car.
Arduino Uno and Flex Sensor Schematics
Starter Project
My Starter Project is the TV-B-Gone Kit, a device that allows me to turn off any TV within range. I enjoyed this project because I learned about the different electrical components and their roles in this circuit as well as how to solder.

How it works
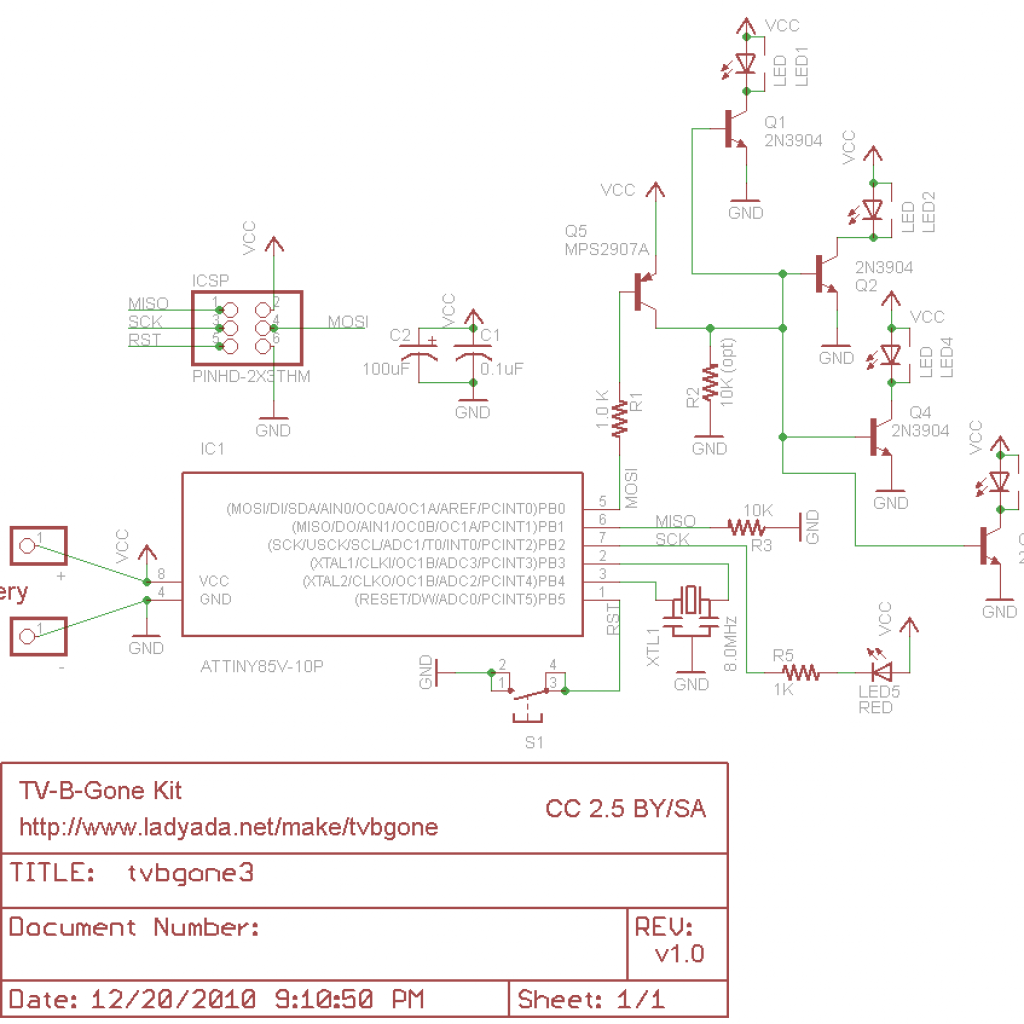
The TV-B-Gone Kit is powered by 2 double A batteries. There are transistors, capacitors, resistors, LEDs, and a microcontroller. The transistors are used to switch electrical singnals into electrical power. The capacitors are used to store electrical power in a electrical field. The resistors are used to limit the amount current flowing in the circuit. There are 3 types of LEDs, the green LED, the clear LED, and the blue LED. The green LED is used as an indicator that the device is operational. The clear LED is a wide ranged ir sensor that reflects off of any TV. The blue LED is a narrow ranged LED that also sends off ir sensors, and then reflected back by any TV. Finally, the microcontroller’s job is similar to a CPU’s job in a computer. It tells the device what to do and when to do it.
Tv-B-Gone Kit Schematic
