Smart Mirror with Motion Detection
There are 3 components to the Smart Mirror: The mirror, the monitor, and the frame. The monitor is powered by a Raspberry Pi 3 that displays the Magic Mirror interface. The frame encases both the mirror and monitor to create the Magic Mirror illusion.
Engineer
Aditya M.
Area of Interest
Computer Science/Computer Engineering
School
Lynbrook High School
Grade
Rising Senior
Final Milestone
This week at BlueStamp, I focused on the assembly of my frame, acrylic and mirror. While I was waiting for my parts to arrive, I began to work on making my own module. I decided to have my module display various quotes from the TV show: Avatar: The Last Airbender. I already implemented the random_quotes module, but for this module, it was all about getting the experience of making my own module. I will make sure to work on that even after the program.
For the assembly, I first used tape to mark how large I want my acrylic to be and used the edges of the tape to guide my knife when I scored the acrylic sheet. Scoring is basically where you repeatedly cut on a line, creating a sort of a ridge. I then snapped the acrylic across that ridge to get a nice clean edge. After that, I attached it to my frame using the clips that came with the frame.
After my desk mount arrived in the mail, I clamped it to my desk and attach it to the monitor. I then created two small cardboard boxes: one that my Raspberry Pi can sit and another for the PIR motion sensor. I attached the boxes to the back of my monitor using duck tape, and then duck taped my frame onto the monitor. After connecting all the wires and launching the MagicMirror build, I was done with my project!
Second Milestone
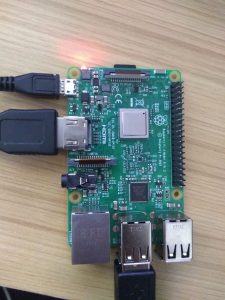
This week, I focused on implementing my PIR Motion Sensor, which will detect infrared waves. I did this by connecting the pins on the PIR Motion Sensor to the GPIO pins on my Raspberry Pi using 3 female-female jumper wires. The 5V pin, output and ground pins on the sensor were attached to their respective pins on the Pi. I also adjusted the sensitivity and time delay to my liking by twisting the knobs at the top of the sensor.
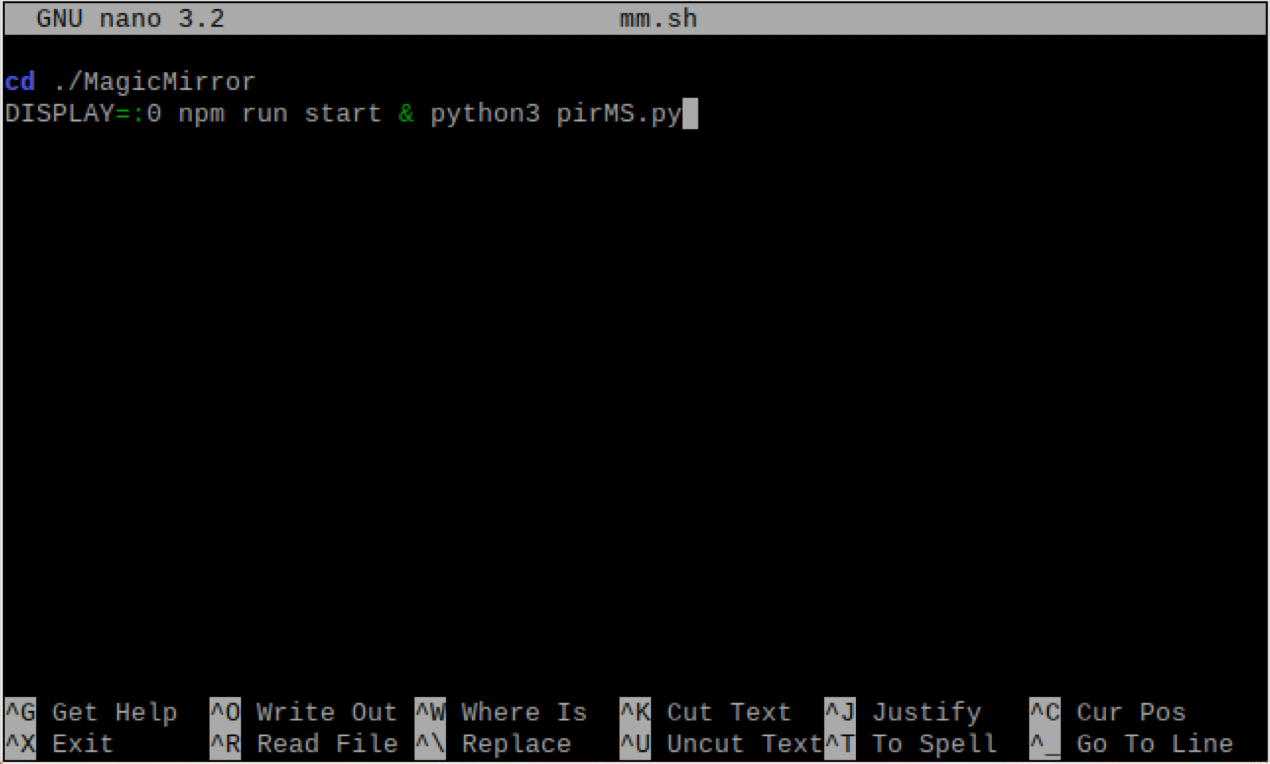
Then, I wrote a short shell script so that I could execute the Python file I just made simultaneously with the MagicMirror run command. In the script, I had the program navigate to the MagicMirror directory and then set the default display to on. Then, I executed the two commands I described earlier at the same time using the ‘&’ operator.
I was also able to implement a Spotify and email module. The Spotify module shows various information on the song you’re currently listening to on Spotify. I had to use the Spotify Developer App to redirect the URL to a local host and get the client ID and client secret ID. I put both client IDs in my config.js file and configured the module further to my preference. For the email module, which displays any unread emails you might have, I enabled IMAP on my Gmail account and configured my email address and password in config.js.
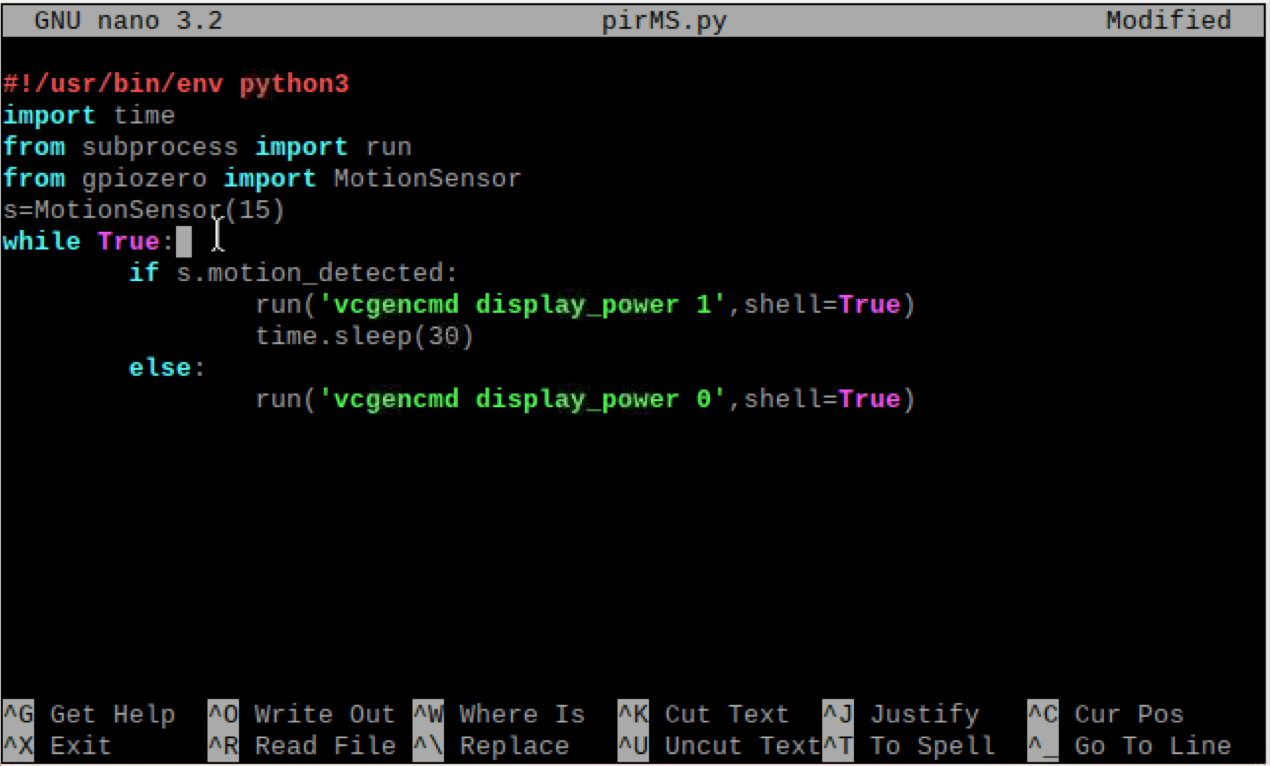
Now that my sensor is functional, I need to write code that reads the sensor output and depending on the result, it will turn on or turn off the HDMI port. I also made it so that after a minute of inactivity, the screen will turn off. I did this by importing all of the libraries I need, and reading the sensor output using the MotionSensor function from the gpiozero library. Another library I used was subprocess, which allows me to use the Python script to run terminal commands. The program will run the function “display_power 1” from the vcgencmd utility (which controls the graphics settings of the display) if the sensor detects any motion and will run “display_power 0” otherwise. To check if no motion has been detected in the past 30 seconds, I used the time.sleep() method, which suspends the execution of the program for a certain amount of time.
First Milestone
Before vs. After

Note: The before image was taken after Google Calendar was implemented.
For my first milestone, I mainly worked on getting the base setup for MagicMirror up and running as well as some modifications. I first got my Raspberry Pi all setup and cloned the MagicMirror Github repository onto my Pi. Within config.js, I decided to keep the alert, clock and compliments modules but decided to modify the rest.
For the calendar, I decided to use a 3rd-party module called MMM-MyCalendar and synced it to my Google Calendar using the private url found in settings. After making some other minor changes, I decided to change the newsfeed module to The Mercury News. I did this by using an API provider to get the RSS feed link for my desired news source. Once I did that, I generated an API key on openweathermap.org and found my location ID, which I put into the currentweather module. Next, I used a 3rd party module for the weather forecast called MMM-MyWeather, where I used my WeatherBit API key as well as the latitude and longitude of my location. I also implemented random_quotes, another 3rd party module, to display an inspirational quote that cycles every couple minutes. The last modification I made was add yet another 3rd party module called MMM-COVID19, which as the name indicates, will display they current Covid-19 status in your desired countries. I then made some other minor configurations to my modules based on how I wanted the display to look.
This week, the main problem I encountered was getting the weather forecast to display correctly. I wanted to use a 3rd party module but most of them used API providers that were out of service. After a lot of digging and research, I was able to find a module that used a usable API provider. Another struggle I had was to get the calendar to update during runtime whenever I changed events on my Google Calendar. After a bit of trial and error, I realized that I had to move the fetchInterval configuration to the config block and not in the calendars block.
Overall, I’m pretty happy with what I was able to get done this week and next week, I hope to implement a motion sensor so that the mirror would turn on whenever a person is in close proximity.
Raspberry Pi Setup
1.) Use Raspberry Pi Imager to write the Raspberry Pi OS onto your microSD card.
2.) Insert microSd card into its respective slot located on the underside of the Pi.
3.) Connect HDMI cable to the Pi and monitor.
4.) Connect both keyboard and mouse using the Pi’s USB ports.
5.) Connect power adapter to an outlet and the Pi.
6.) Turn on monitor and setup initial configurations.