
Final Project
Hi, my name is Victor Y, and I am going to be a senior at Monta Vista High School. My main project is an arcade machine emulator with the cabinet, based on this. My starter project is an electronic keyboard, based on this.
Photo:

My experience at Bluestamp Engineering not only improved my engineering skills, but also taught me several life lessons. I improved both my electrical and mechanical engineering through wiring, coding, and 3D designing. The various lectures opened me to the many job opportunities waiting in the future, and I also learned how to solve problems on my own. I liked Bluestamp’s hands-on way of teaching and learning, because everyone could learn at their own pace. In my school, the teacher tries to make everyone advance at the same pace, but this does not happen at Bluestamp. The faster students can advance quicker while the slower ones can focus on solving their problems with no pressure.
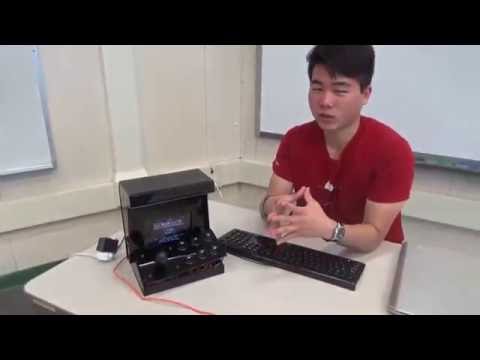
Since my last milestone, I have designed and put together a cabinet made out of quarter-inch thick black acrylic. Initially, I sketched out my idea and then modeled it on a computer using the 3D modeling software, Tinkercad. After the pieces were cut out on the acrylic, I glued them together using an acrylic weld. Acrylic weld was a strong glue for acrylic, and only took minutes to dry. I also drilled holes into the front panel for the joystick, screws, and the six buttons. The first time, the front panel cracked because the drill was too strong for the board. I solved the problem by drilling the wholes into a big piece of acrylic before cutting the panel out.
Once the cabinet was done, I had to connect the joystick and buttons to the GPIO pins on the raspberry pi. I used crimps and crimp terminals and female-female wires to connect the buttons and joystick to the raspberry pi pins. I then added a driver from Adafruit’s website which allowed me to make the buttons function correctly on the emulator’s menu. Right now the buttons and joystick don’t work in game, but don’t worry; I am working very hard on that issue!
Joystick/buttons wiring

Milestone #2
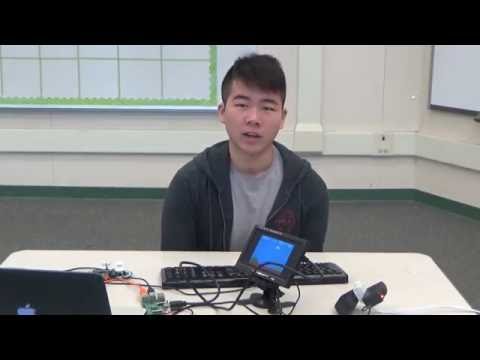
This is my second milestone. I have successfully finished the Raspberry Pi Arcade Emulator project. I have downloaded ROM games from the internet and put them onto the Raspberry Pi. I did this by first connecting the Raspberry Pi to the internet. I was forced to use the command line to do this because I only had RetroPie installed. I connected to the internet by editing a config file and adding the name and password of the network I wanted to connect to. Then I had to make sure it was connected by finding out what the IP address of the Raspberry Pi was.
Once I had the IP Address of the Raspberry Pi, I could wirelessly connect my computer to the Raspberry Pi. I did this with the command line again. I created a folder with all of the NES ROM files I had downloaded, and navigated to that folder within the command prompt. I then used scp * pi@[IP ADDRESS]:~/RetroPie/roms/nes to transfer all of my files in that folder into the Raspberry Pi. Once this was complete, I just had to start up RetroPie and check if the files had been successfully transferred. They were, and I could now play internet-downloaded games on the Raspberry Pi.
In the future, I might code a game for the Raspberry Pi. I will look into other modifications and ideas.
Milestone #1
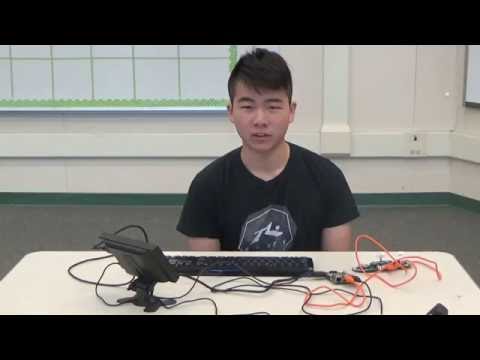
This is my first milestone. I have successfully connected the Raspberry Pi to the monitor and the other components. I have switched from PiPlay to RetroPie because PiPlay did not work with the rest of my hardware. The Raspberry Pi is connected to a wireless mouse, a wired keyboard, an Arduino controller, and the monitor by an HDMI cable. The main challenge I faced was with PiPlay. No matter what I did, PiPlay would not work with my materials. I tried installing Raspbian and then PiPlay, I tried only installing PiPlay, and I reset my Micro-SD card many times. None of these methods worked. In the end, I had to use RetroPie instead of PiPlay, which still works for my purposes.
Right now, I can only play the games already installed in the Raspberry Pi. In the future, I would like to add ROMS downloaded from the Internet onto the Raspberry Pi. I would probably do this with a USB stick. After that, I want to try programming my own game and putting it onto the Raspberry Pi.
Starter Project – Mini Piano Keyboard
This is my starter project, an electronic piano keyboard. When the switch is turned on, the first LED lights up. When the button is pressed, the second LED lights up, and a pre-programmed tune from the microcontroller is played. The octave controller (blue box) lets you switch between three different octaves. The program contains an array of the values of each key, and when the value exceeds a certain threshold value a sound is emitted. This happens when pressure is applied to the key. My main problem with this project was figuring out that the battery holders were too loose. I was trying to figure out the problem for three hours when I realized that this was the issue. Throughout the process, I snapped two capacitors and had to replace them. I also learned not to apply too much solder.

You’re hot Victor
<3