Eamon H.

Hello, my name is Eamon and I am a rising junior at Manhasset High School. The Intensive project I decided to build is the fingerprint and keypad safe. The reason I wanted to build this safe over other projects is because it included both arduino coding skills that I could learn as well as a real world engineering aspect. I have the capability to learn both about coding and how to put components together in order to create a complex project. I have always been fascinated with the idea of fingerprint scanning and my project also has an effective purpose to it. The starter project I decided to build was the voice changer, I chose it because i felt that working on the voice changer would be helpful in reestablishing my soldering skills and would also teach me more about sound, an idea I may wish to use in my main project at a later date.


Reflection

Looking back on my project I feel that it has allowed me to gain experience in the field of engineering and also it has given me an opportunity to realize my dreams of becoming an engineer. Before Bluestamp I had a wish but no practical experience to test whether or not I really believed that wish was right for me. I thoroughly enjoyed encountering obstacles and slowly working my way around them. Nothing will surpass the feeling of being stuck on a problem and then having a flash of inspiration that guides one to the eventual success. To start with merely an idea and continually advance forward in the pursuit of its realization is the essence of engineering. Now that I have a completed project outfitted with my own special modifications I feel as if the past few weeks have been worth it. This is the first time I can look down on something and say that I am the one that created it. The greatest challenges I faced were when certain parts of the safe wouldn’t work for extended amounts of time. I had to troubleshoot for days just to solve one problem. I learned that to be an engineer is to solve one problem after the other until something magnificent emerges.

Engineer

Eamon H.

Area of Interest

Electrical/Mechanical/Computer Engineering

School

Manhasset High School

Grade

Incoming Junior

Final Milestone

My project during this program was the Keypad and Fingerprint scanning safe with the added modifications of a liquid crystal display and an RFID scanner. The project began with figuring out the fingerprint sensor and having it work with the keypad to turn the servo. Then the safe itself was modified to accompany the different components with the use of the dremel. After the safe was successfully modified I attached the Fingerprint sensor and Keypad; I also had to attach the servo in such a way that it tightly locked the box. Once this step was over the original safe was finished; however, the modifications continued on in the form of the liquid crystal display to issue commands and the RFID scanner to open up the safe with a wave of an RFID tag. I learned how to work with RFID and much about the arduino itself (functions of each pin) as well as how to overcome challenges. One of these challenges was enabling the RFID to only recognize one tag, an obstacle that took several days to come to fruition.
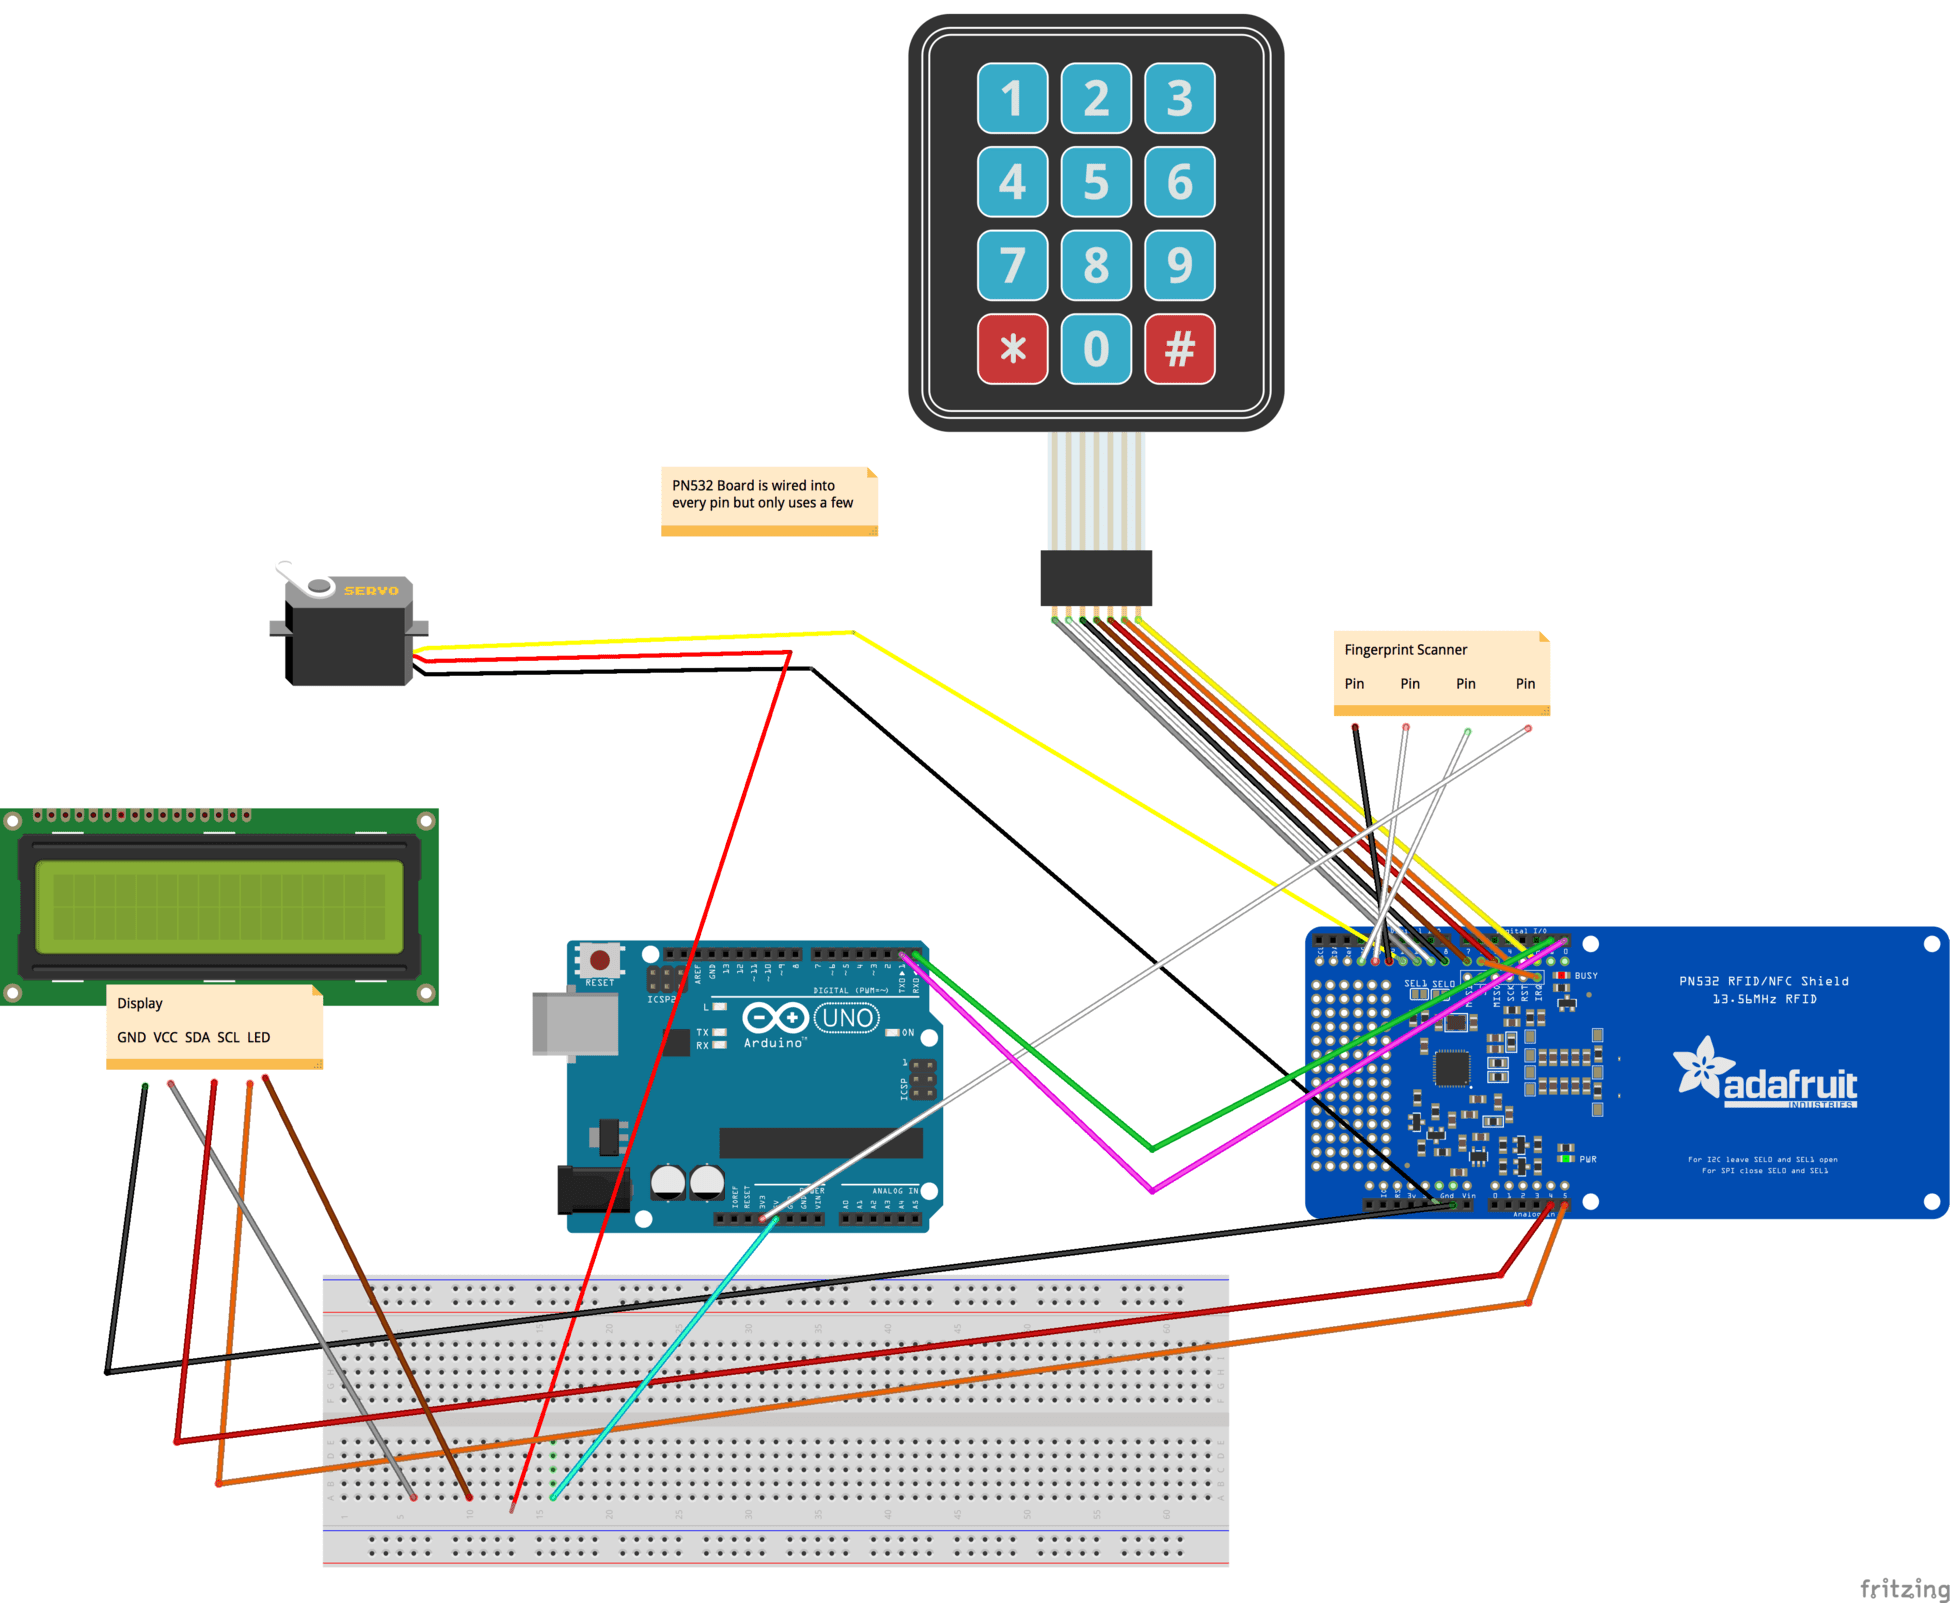
 

Github Code

Bill of Materials

safe-diagram_bb

Third Milestone

This final phase of the original project was by far the easiest to accomplish. During this part I had to draw out areas on the box so that I could cut out slots for my materials. While it did take some time the work only consisted of cutting and glueing, as well as designing an effective lock to keep the box closed.  It was during this phase that I decided to put the portable charger on the outside because if the box was ever locked and it lost power I would be unable to unlock it in order to recharge. The lock however was the hardest part, designing an effective solution to the problem considering the materials were not created for the purpose of keeping someone out of a safe proved to be a challenge. I eventually made use of metal L-brackets to keep the servo in position and keep the box locked. Because the lock is a servo it still isn’t very secure, I am currently planning on adding a push/pull solenoid so that it remains locked under greater amounts of stress.

Second Milestone

The next phase of the project was to write the code that allowed the keypad to function with the fingerprint scanner in order to turn a servo. To start out I disconnected the fingerprint scanner and focused solely on making numbers appear on the serial monitor when I pressed their counterparts on the keypad. After I had this working I set up a series of if statements including the function of identifying the fingerprint and the password function. When the code was finished I could press 1234 on the keypad which would then allow me to start the fingerprint process. When the fingerprint was identified the servo would then turn 90 degrees. If at any point the password was wrong or the fingerprint was not identified the code would immediately revert to the beginning. I also added a few special features such as by pressing 0 the servo would immediately initiate the lock function or by pressing the # one could re input the keycode. The most difficult part of this phase was the password function. The code was very advanced and took me some time to fully comprehend.

First Milestone

My first milestone for the keypad and fingerprint scanning safe was attaching the fingerprint sensor to the arduino, download a library off the internet with the functions I needed, completely understand how the fingerprint sensor works, and then enroll a fingerprint in the fingerprint sensor’s memory drive. First I attached the fingerprint sensor by soldering on header pins so that the wires wouldn’t easily come out of the machine. Then I connected the soldered header pins to the ground, 3.3 V, 12th, and 13th pins on the arduino. After this was completed I downloaded the library off the internet and enrolled my right index finger using the enroll function. The fingerprint scanner took a screenshot of the finger and condensed it into a template, which it would then use to identify my finger again. This template was saved to the scanner’s drive so that even if it was plugged into another computer it would recognize my finger. After this I uploaded the ID finger code to test whether or not my finger would be identified. The hardest part leading up to the 1st milestone was probably finding out how to download a library and make the fingerprint scanner work. I was confused for the longest time about how to upload the code and have the scanner enroll my data.

Starter Project

Eamon's Starter Project

When I built my starter project, the voice changer, I came in contact with several problems. After soldering on all the components the changer didn’t work so I spent several hours troubleshooting problems and learning more about how it worked. After nearly a day of this I discovered the problem was most likely that the parts of the board ripped up because of solder and so I added wires to the board in order to connect several components outside of the board itself. This still didn’t work so I finally decided to rebuild the project. After several more hours the end result was completed and I could adjust the pitch so that my voice changed into several different modes. The machine itself works starting with the ICs (Integrated Circuits). These circuits are microprocessors that take the place of many different circuits in order to keep the size small. The capacitors and electrolytic capacitors store energy, therefore smoothing out the signal in order to protect the machine from voltage spikes. The Zener diode keeps the current moving only in the forward direction and the resistors limit the current, preventing the destruction of certain materials.

Leave a Comment

Start typing and press Enter to search

Bluestamp Engineering