Intro
Hi, I’m Dylan B-F. I am a rising senior at Lowell High School and a core member of the school’s robotics team . I was interested in BlueStamp after a presentation in my computer science class and figured that BlueStamp would be a good place to further my knowledge of science and engineering during the summer. My starter project is a digital multimeter and my main project is an RC hovercraft. I came into BlueStamp used to just building and doing none of the design. But due to rather incomplete and vague details from the instructions I created a full 3D model in SolidWorks. Although the main idea is similar, the execution is different.
Final Project Video!
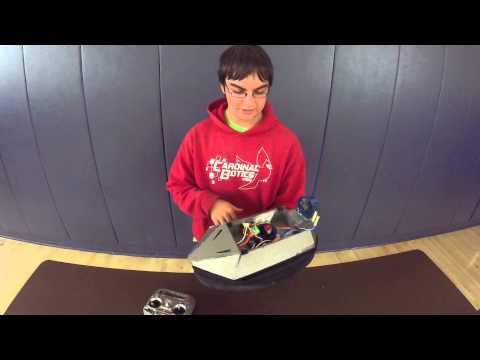
My main project at BlueStamp was this RC hovercraft. Early on I spent about three days on creating a model in SolidWorks. I was able to use some of the evaluation tools in SolidWorks to estimate the weight of the foam structure to be around .2lbs and I was able to approximate the center of mass. While I was waiting for the depron to be laser cut I worked with assembling the electronics. There are two motor controllers that are connected to a switch on one side and on the other they connect to the 55mm EDF fans. The receiver gets power from the motor controllers via signal cable and is also connected and powers the servo used for turning. To hover the center fan pushes air down into the center of the body, comes out holes in the sides and is pushed onto the ground by the skirt.
All the design schematics are available here! There are a few parts included that are not present in the assembly since I re-cut multiple parts by hand.
Main Project Milestone #3
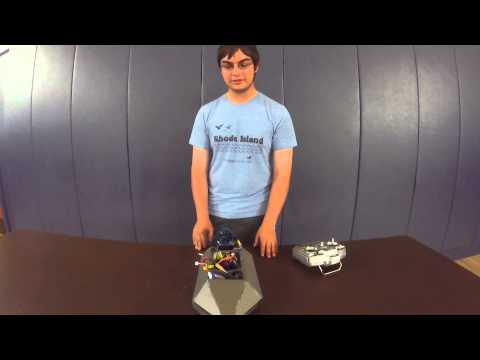
The main part of milestone #3 was the skirt. The skirt is essential for creating the lift since it controls the airflow and directs it toward the ground. It is on the same level as the middle base and was attached using hot glue. The base of the skirt is connected to a rope circle to ensure it keeps its shape. On each side of the skirt there are various supports running vertically and connecting the base of the hovercraft to the bottom rope circle.
Main Project Milestone #2
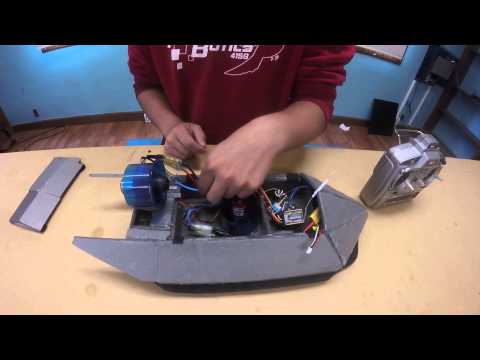
My second milestone consisted of integrating the electronics. The parts I added in were motor controllers, fans, a servo, and a battery. The motor controllers have two input wires and three output wires. The two input wires are red (power) and black (ground). On the output side the colors are red (power), blue (signal), and black (ground). The motor controllers also have a 3-wire cable that connects gets a signal from the receiver. The fans have three input wires which attach to the three wires from the motor controllers. The servo has the same 3-wire cable that attaches to the receiver and is powered directly from the receiver.
Main Project Milestone #1:
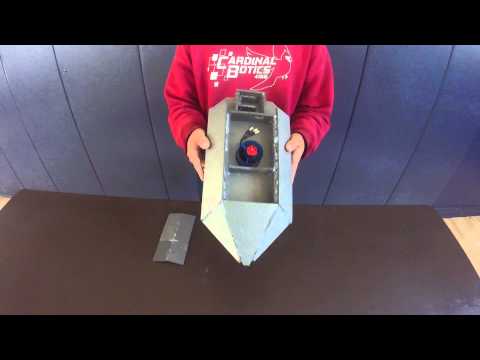
My first milestone for the RC hovercraft is to have my frame for the hovercraft built and a full 3D model of the hovercraft done in SolidWorks. The structure of the hovercraft is built from depron, a very strong and lightweight foam. At the bottom of the hovercraft there is a set of holes which capture airflow from the central fan and sends it out to the sides. One of the next additions will be the skirt which redirects the air down to create a hovering effect.
Starter Project: Digital Multimeter
My starter project was a digital multimeter. This multimeter measures AC voltage, DC voltage, amperes, resistance, and continuity of circuits. The multimeter consists of resistors, capacitors, transistors, and a potentiometer. Resistors are simple, two terminal parts that are used the control the amount of current flowing through a circuit. Capacitors can be charged with electricity and store it in an electric field. Transistors are a semiconductor device for amplifying and controlling electrical power. When one of the terminals (the gate) receives a signal it allows power to flow across the other terminals. NPN transistors allow current to pass when the base current is higher than the emitted. PNP transistors allow current to pass when the base current is 0. The potentiometer acts like a variable resistor since you can change the amount of current it lets pass through.