Sound Controlled Light Show
This will serve as a brief description of your project. Limit this to three sentences because it can become overly long at that point. This copy should draw the user in and make she/him want to read more.
Engineer
Caitlin K.
Area of Interest
ie Electrical Engineering
Gateway High School
Grade
Incoming Senior
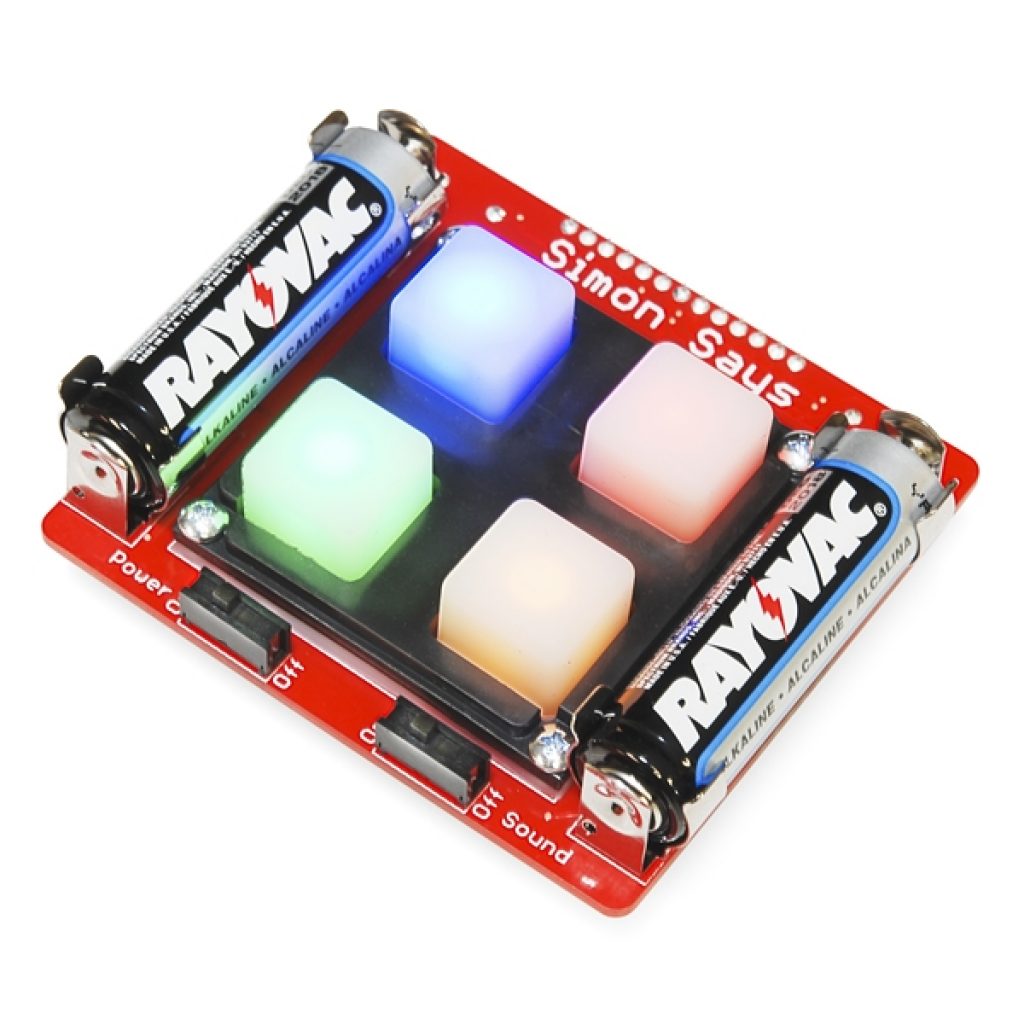
Starter Project: Simon Says
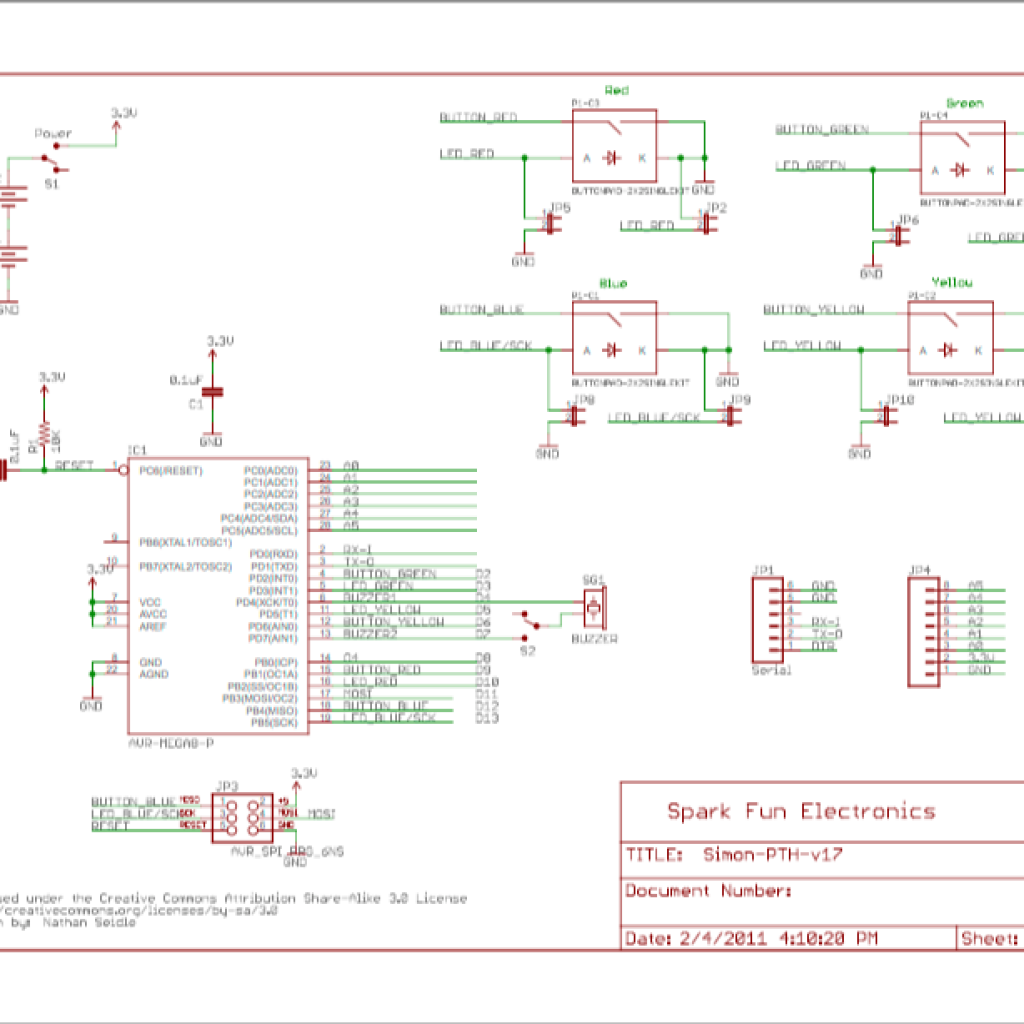
My project is the classic 1980’s Simon Says game. A random LED sequence will light up and then wait for your copied response as it adds more to the sequence. It has two switches: one for the power, and the other for sound. Each LED has a specific sound it plays as it lights up.
The Simon Says starter project comes with many different components each with a unique job. The battery is like a heart: used to power the device. The microcontroller is like the brain: telling LEDs to light up and Alarms to sound based on the input it receives. The buttons are like the skin; able to send signals to the “brain”. While it is easy to explain what each component does, it is more important to understand how each component works and is connected to make something bigger than itself, the body. The power source starts when you turn the switch on. Turning on the switch allows the power from the battery to actually flow instead of just stopping once it gets to the switch. Once current is allowed to flow it goes from the battery through two different capacitors which then lead to the microcontroller. By going through the capacitor first, current gets stabilized so that if at any point the current from the battery drops the capacitor can be used as a filller. The micro controller is where all the thinking and computing happens. The one that came in my kit was already preprogramed and it can be modified. This allows it to determine things like whether or not you hit the right color and where the commands to do the next steps come from such as light up a certain LED or play a sound. However, before the commands for the microcontroller sent anywhere it has to go through the resistor. The resistor slows down the current before it goes out to the LEDs and buzzer which keeps them from blowing out. The resistor works like the capillaries in our bodies that slow down the blood flow so that it is not to forceful when it goes to different parts of your body. Once it goes through the resistor it is ready to go back out to the LEDs and buzzer. Depending on which point of the microcontroller the current comes out of a certain LED will light up and simultaneously play a sound that corresponds with that particular color. Now that the microcontroller has told you which light you have to press it waits for your respons. There are actually 2 rings around the light with 2 pins on either ring which do not connect. The inner rings are all connected to each other and the battery while the other ring is connected to the microcontroller. When you press down on the button it connects the two pins at a very very low resistance which allows the current to easily flow through. Once back to the microcontroller you either start back again and it will play a new light or it will play the game over sequence however they both work as I explained before.