
Hi, I’m Aaron and I attend Uncommon Charter High School, in Crown Heights, New York. One of the reasons I had for attending Bluestamp was the fact that it was an opportunity for me to learn and network with my peers. I learned about Bluestamp through my past semester with OppNet, a networking enrichment program that centers around finding opportunities both in and outside of communities. I digress – as a young child, growing up in my neighborhood, there weren’t many stories of success. I was interested in learning things and teaching them to my friends and family, to become a role model and to keep myself away from trouble. I joined Bluestamp because I wished to enter a new chapter in my life.
Intensive Project Documentation:
Now it is time to showcase my main Project, the smart watch! With this, I am able to pair my phone with my Arduino, a device that can read inputs that are sent to it, via a bluetooth HC06 module, in order to draw images on my 128x64 OLED.
Arduino Source Code( edited for graphics display)
Build Plan:
https://docs.google.com/document/d/1vCDKnzOKZBEYHpIoACspbypkeRWI0-j2e-n5SxP1A14/edit?usp=sharing
Bill of Materials:
https://docs.google.com/spreadsheets/d/1WD3oQuU4D5T2-4EmtCJgZy2gYUg7mivTOCX2wLY0ais/edit?usp=sharing
(please note that the HCO6 module is only compatible with Android)
RetroWatch Schematic:Untitled Sketch 2.fzz 2
RetroWatch first Milestone video:
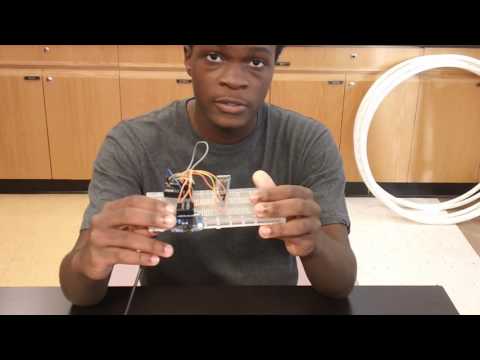
My first milestone was to get my OLED screen to light up and show its default “00:00” time, which I have accomplished at the moment, my second milestone is to synchronize my phone with the bluetooth so that I can begin to print images onto the OLED. One fun thing is being able to see the OLED screen light up after days of hard work. One challenging thing was that the site explaining the steps was not very precise, and so the building and coding process took a lot of time to understand and start.
My second milestone was getting my smart phone to synchronize with my arduino using a HC-06 bluetooth module. This was difficult for me, bbecause I often had trouble finding out the problems, regarding why My arduino hadn’t gotten the messages that my bluetooth module had been sending it. This then resulted in me having to desolder everything and
Build Plan:
https://docs.google.com/document/d/1vCDKnzOKZBEYHpIoACspbypkeRWI0-j2e-n5SxP1A14/edit?usp=sharing
RetroWatch referral website:
http://www.instructables.com/id/Make-your-own-smart-watch/?ALLSTEPS
CAD Drawing:
Archive
Starter Project Video:
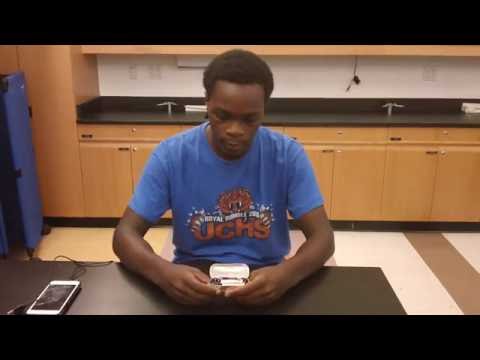
Here is the introduction to my starter project- the MintyBoost. The MintyBoost is a very small but efficient gadget that converts energy from batteries into energy that can be used to charge handheld devices, such as a phone! The three main parts to the MintyBoost are the Boost Converter chip, the Power Supply capacitor, and the 10uH power inductor. The role of the Boost converter is that it is a power converter that steps up voltage from the battery and maintains the voltage at the USB port. The role of the Power Inductor, is that it resists any change in electrical current flowing through it. Thus energy is stored in the form of magnetic energy when the switch in the chip is turned on. The role of the power supply capacitor is that it can maintain the level of voltage in a system by storing charge. And the stored energy adds to the current flowing through the circuit when the switch in the chip is turned off. After many iterations the voltage raises to 5V and the voltage is maintained at a constant 5V. Because of this, the MintyBoost charger, with an input of 1.5V per battery (3V in total) is able to convert energy to charge a 5V USB port!
Starter Project Referral Website:
https://learn.adafruit.com/minty-boost/solder-it